Step by step Installing vMikrotik on VMware Workstation 11.0
This time I discuss a bit about Mikrotik, for friends who every day as IT Network Administrator or friends must be familiar with the name Mikrotik. Mikrotik is one of the router products of many brands of routers like Cisco, Juniper dll.
Mikrotik features no less sophisticated and very complete and enough to meet the needs of the network in the company either SOHO, Enterprise or ISP also many who use this product.
Some of the features that are often used Mikrotik in the company include:
1. Firewall and NAT
2. Bandwidth Management
3. Web Proxy
4. Hotspot
5. VPN Server etc.
This time I explore a little how to create vMikrotik (virtual Mikrotik) on PC / Computer that already installed VMware Workstation. The steps are the same as if we install the Mikrotik PC Router, only this can be an alternative other than using a Mikrotik Router Board or Mikrotik PC Router because by using VMware Workstation we will have many advantages, one of us we save NIC (Lan Card) because we can create multiple Network Adapters in VMware Workstation
Okay we prepare first the ingredients:
1. PC already installed VMware Workstation (either on Windows / Linux)
2. Mikrotik
After the materials have been prepared, we now start the installation:
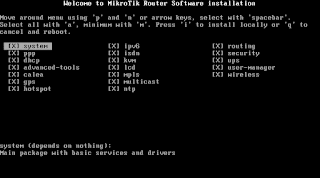
4. Then there will be a message Do you want to keep old configuration? [y / n] : here we select No by pressing the N key because we will configure our Mikrotik ourselves.
5. Continue message? [y / n] : we select Y to continue the installation process.
6. VMikrotik installation is complete, press Enter to reboot.
9. Since this mikrotik has not been configured, we first type Setup
10. In this option, we select (configure ip address and gateway).
11. we choose (add ip address) and change interface from ether1 to WAN.
12. Fill in the Ip / netmask address: 192.168.1.2/24 (according to IP WAN Mikrotik topology above).
13. For the gateway we skip ahead by choosing X (exit menu) because later we will configure using Winbox.
14. IP WAN vMikrotik we have confirmed.
15. now we restart our vMikrotik first. Type reboot system then press Enter.
16. vMikrotik display in VMware Workstation.
17. Log into Browser and type 192.168.1.2 (IP WAN vMikrotik) and Winbox download.
18. Now we will login to vMikrotik via Winbox to make it easier to configure. Connect to: 192.168.1.2 Login: admin Password: (empty) then press the Connect button.
19. Now we can configure Mikrotik as per our requirement.
For Mikrotik configuration wait for next article 😀 Hopefully useful and good luck and Thank you.


Comments
Post a Comment